Graphic Recording Case Studies
Graphic Recording offers so many options for your organization, it’s hard to know how to integrate it into your next meeting or use it to bring clarity to your team’s process. What do you need? How do you plan? How do you budget?
Here are a few case studies past projects to help you decide how integrate Post Marks’ graphic recording into your plans.
If you have questions, want to discuss your specific project, or want to do something new and invovative, please reach out to start a conversation.

small-group, marker and paper graphic recording (2023)

large convention, digital graphic recording (2019)

community conversation with audience feedback on post-its (2017)
Live Graphic Recording
Performing graphic recording at a live meeting is always exciting, engaging and unpredictable in the best way.
During a live graphic recording session, I recording your meeting as it’s happening. I take notes from your keynote presentations, record feedback from listening sessions, or draw ‘containers’ for your participants to post their feedback. When it is done well, it looks like magic.
What is the secret behind the magic? Planning, collaboration and vision.
When your organization decides to integrate graphic recording into the agenda, we’ll have a planning session to decide what type of graphic recording is right for your session. Will it be done digitally and projected to the audience? Will it be done using marker and paper somewhere in the room? Will the audience interact with the image in some way, like voting with dots or adding feedback with Post-its? What are some meaningful images to support your organization’s message.
When should you start planning?
We can begin to collaborate on intigrating graphic recording into your meeting during the initial stages of your conference/session planning. We’ll discuss options, budget, how it will be performed, and what your desired outcomes for the recording will be.
Is is most important to have participants view it as it’s being drawn?
Is it more important for people who are attending virtually or attended another session?
Is the ultimate goal to include it in your post-event messaging to share the most important points with your community who may view it weeks or months later?
Is it done digitally or using paper and marker?
Will you record every session or just particular presentations?
When your conference agenda is set and we’re days away from the event, we’ll do any final final planning and you’ll provide a copy of the agenda, any speakers notes, slides and your organizations’ style guide, as well as an imagery or visual metaphors that are important to the theme of the event. This helps me plan my recording and anticipate the flow of the presentations. The style guide and themes of the event help me make sure the recordings are meaningful and specific to your organization, reinforcing the messages that are important to your organization.
How do I budget for a live event?
I charge a day rate for full day events, which are events lasting four or more hours. For shorter sessions lasting 2-3 hours, I’ll pro-rate my daily rate. Depending on the complexity and location of the event, there may be additional fees for planning, travel outside the Anchorage area, and supplies.
My date rate includes two to three hours of planning meetings before your event, preparation in days leading to the event and the day of the event itself, and post-event clean-up the day of the event, as well as basic post-production of the images so there are ready for sharing to participants, your organization leadership, social media and reports. As part of the pre-event organization, we’ll develop a plan and timeline for how the images will used after the event so you get everything you need when you need it and in a format that is the most useful for your organization and your audience.
Case Study 1: In-person and Virtual Statewide Artist Summit
The organizers of a one-day statewide artist summit wanted a way to engage their in-person participants and the many artists who were attending virtually from around the state. They also needed to capture the big takeaways for the artist and arts supporters who could not attend. They wanted the visual notes to be approachable and not assume any prior knowledge so they would be a valuable resource to artists who may learning about the summit long after it is over.
At our first meeting approximately a month before the event, we discussed an early draft of their agenda and which sessions would require graphic recording. Their event would be four hours long and combine in-person speakers, live question and answer sessions between the audience and panels of artists, community feedback at their meal break using a large graphic in the atrium and through a virtual whiteboard by the on-line attendees, and several short pre-recorded video segments.
In our discussion, we decided it would be valuable to only perform graphic recording for the live speakers and panel discussions. In addition, I would design two graphics for the room and identical slides for the virtual attendees to guide their written feedback. The feedback would compiled by staff on-site and on-line moderators so I could transcribe the most valuable feedback into a visual note. I would use any time during the video segments and breaks between speakers to fill in any gaps in recording, prepare for the next segments, and, if needed, make any corrections. We also scheduled in a break to eat and touch base with the organizers and tech staff.
We also reviewed the layout of the room and how the notes could be viewed by the in-person attendees and virtual attendees. They outlined how their videographers and technical contractors would be presenting the slides to the in-person audience and recording the session for the virtual attendees. The video production staff would also create a professionally produced video recording of the entire event, presenter’s slides, and visual notes. The video of the entire summit would be posted online so participants could rewatch and share their favorite segments or watch the entire session weeks and months later.
We decided what size, shape, and resolution they wanted for the visual notes so they would be shareable and the most useful after the event. Some events want the notes to fit a standard sheet of paper so they can be compiled into a document or used as slides in the organization’s presentations. Others want them to be a square to share easily on social media.
I received a copy of the organization’s and the summit’s logos, branding, and brand colors. I used these to make brushes and slides that integrated their logos and brand colors on every slide of notes. This extra touch would allow them to include any of the individual slides in their post-event emails and online messaging.
After the initial meeting, I provided a formal quote and we completed the contracting necessary to move forward.
At our second meeting a week before the event, I met with the videographers and technical team to go over what technology they would have on site, what technology I would be using for my notes, and any cords we would need to connect during the event. We decided I would perform the graphic recording digitally on an iPad so it could be recorded as it was being drawn. My live drawings would use as one of the video feeds for the virtual attendees and combined with the live recording of the presentations, their slides, and pre-recorded segments. The on-line attendees would also see me drawing live as if I was a virtual participant of their videoconference. I would also send final versions of the slides to the technical team during the event so the images could be shown on the main screen at breaks. We did not want the visual notes to be shown live to the on-site participants because it would draw attention from the presenters. We also made plans for where I would be seated in the venue so my equipment could be attached to the video production equipment, and I had a clear, unobstructed view of the stage.
At our final meeting the day before the event, I received a copy of the final agenda and confirmed the plan for the graphic recording. They approved the design for the slides and how their logos would be integrated into the graphics. The on-line moderators and in-person facilitators were informed of the graphic recording plans and had an opportunity to ask questions and make plans for how to share information during the event.
On the day of the event, I arrived an hour early so I could collaborate with the technical team, touch base with the event staff, and set up my equipment. I brough extra cords and supplies just in case something unexpected goes awry.
The week after the event, I sent draft copies of the slides for approval, then the organization received several versions of print quality and smaller, shareable versions of .jpeg and .pdf, as well as the final invoice.

Studio Graphic Illustration
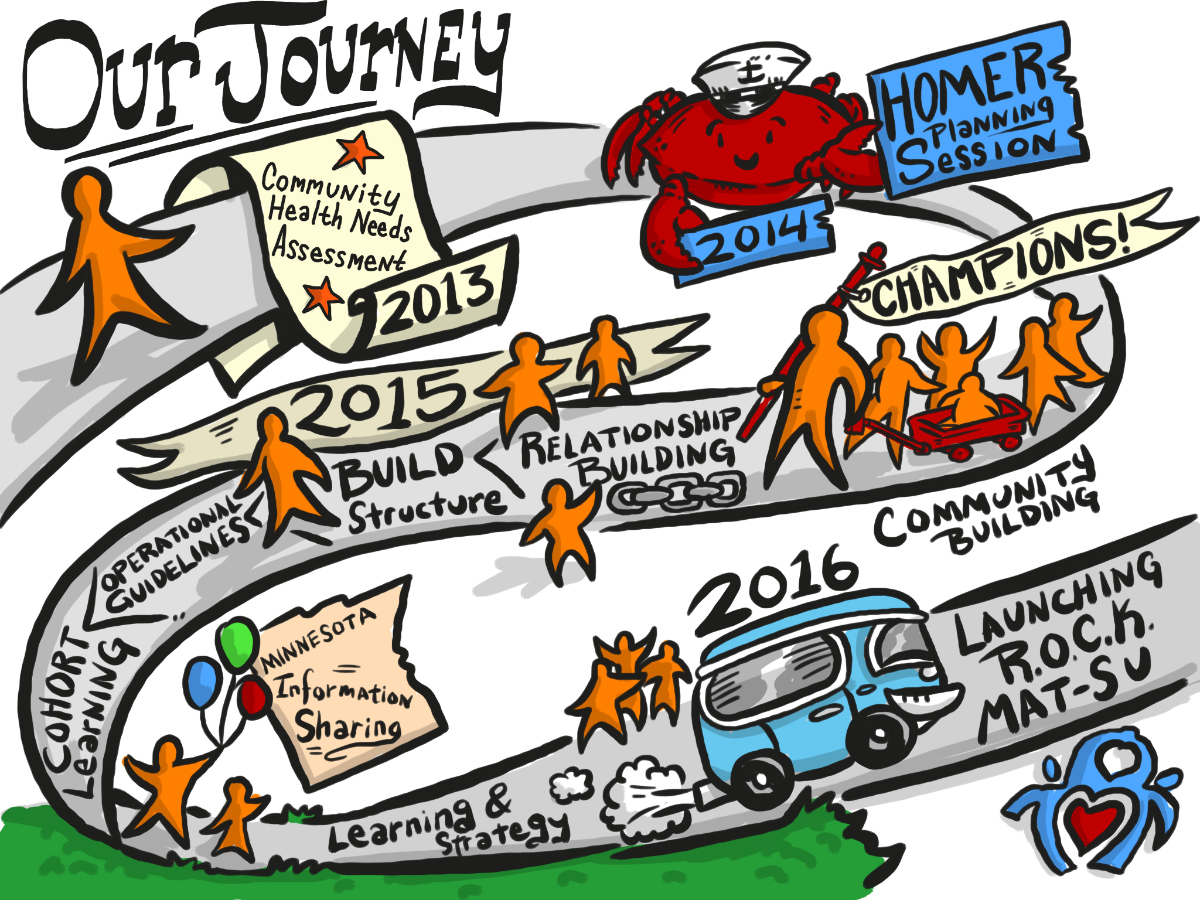
Studio graphic illustration is an illustration completed in my art studio aways from the unpredictability of a ‘live’ meeting. Do you want a graphic to help shape a conversation? Do you want a meaningful, unique ‘container’ to help your participants provide feedback to the organization? Do you want a polished graphic to explain a process memorialize a milestone for your organization? These graphics can be prepared to use in anticipation of a gathering, during a presention, as part of a report, or to record the outcome of a group discussion during an event. By design, studio illustrations are used long after a specific event is over. My work has helped guide new employees learning concepts, informed the public on an organizations vision, and helped guide deep discussions with students on their personal journeys with an education program.
When should you start planning?
Studio illustrations take more time to develop than live illustrations because your organization and I are collaborating every step of the process. Depending on their complexity and intent, a graphic could be produced within two weeks to a month based on one or two meetings to develop a concept. More complicated graphics may require more time and collaboration.
How do I budget for a studio graphic recording?
Studio Illustrations are priced by the complexity, size, and number of illustration rather an hourly or day rate for meetings and illustration time.
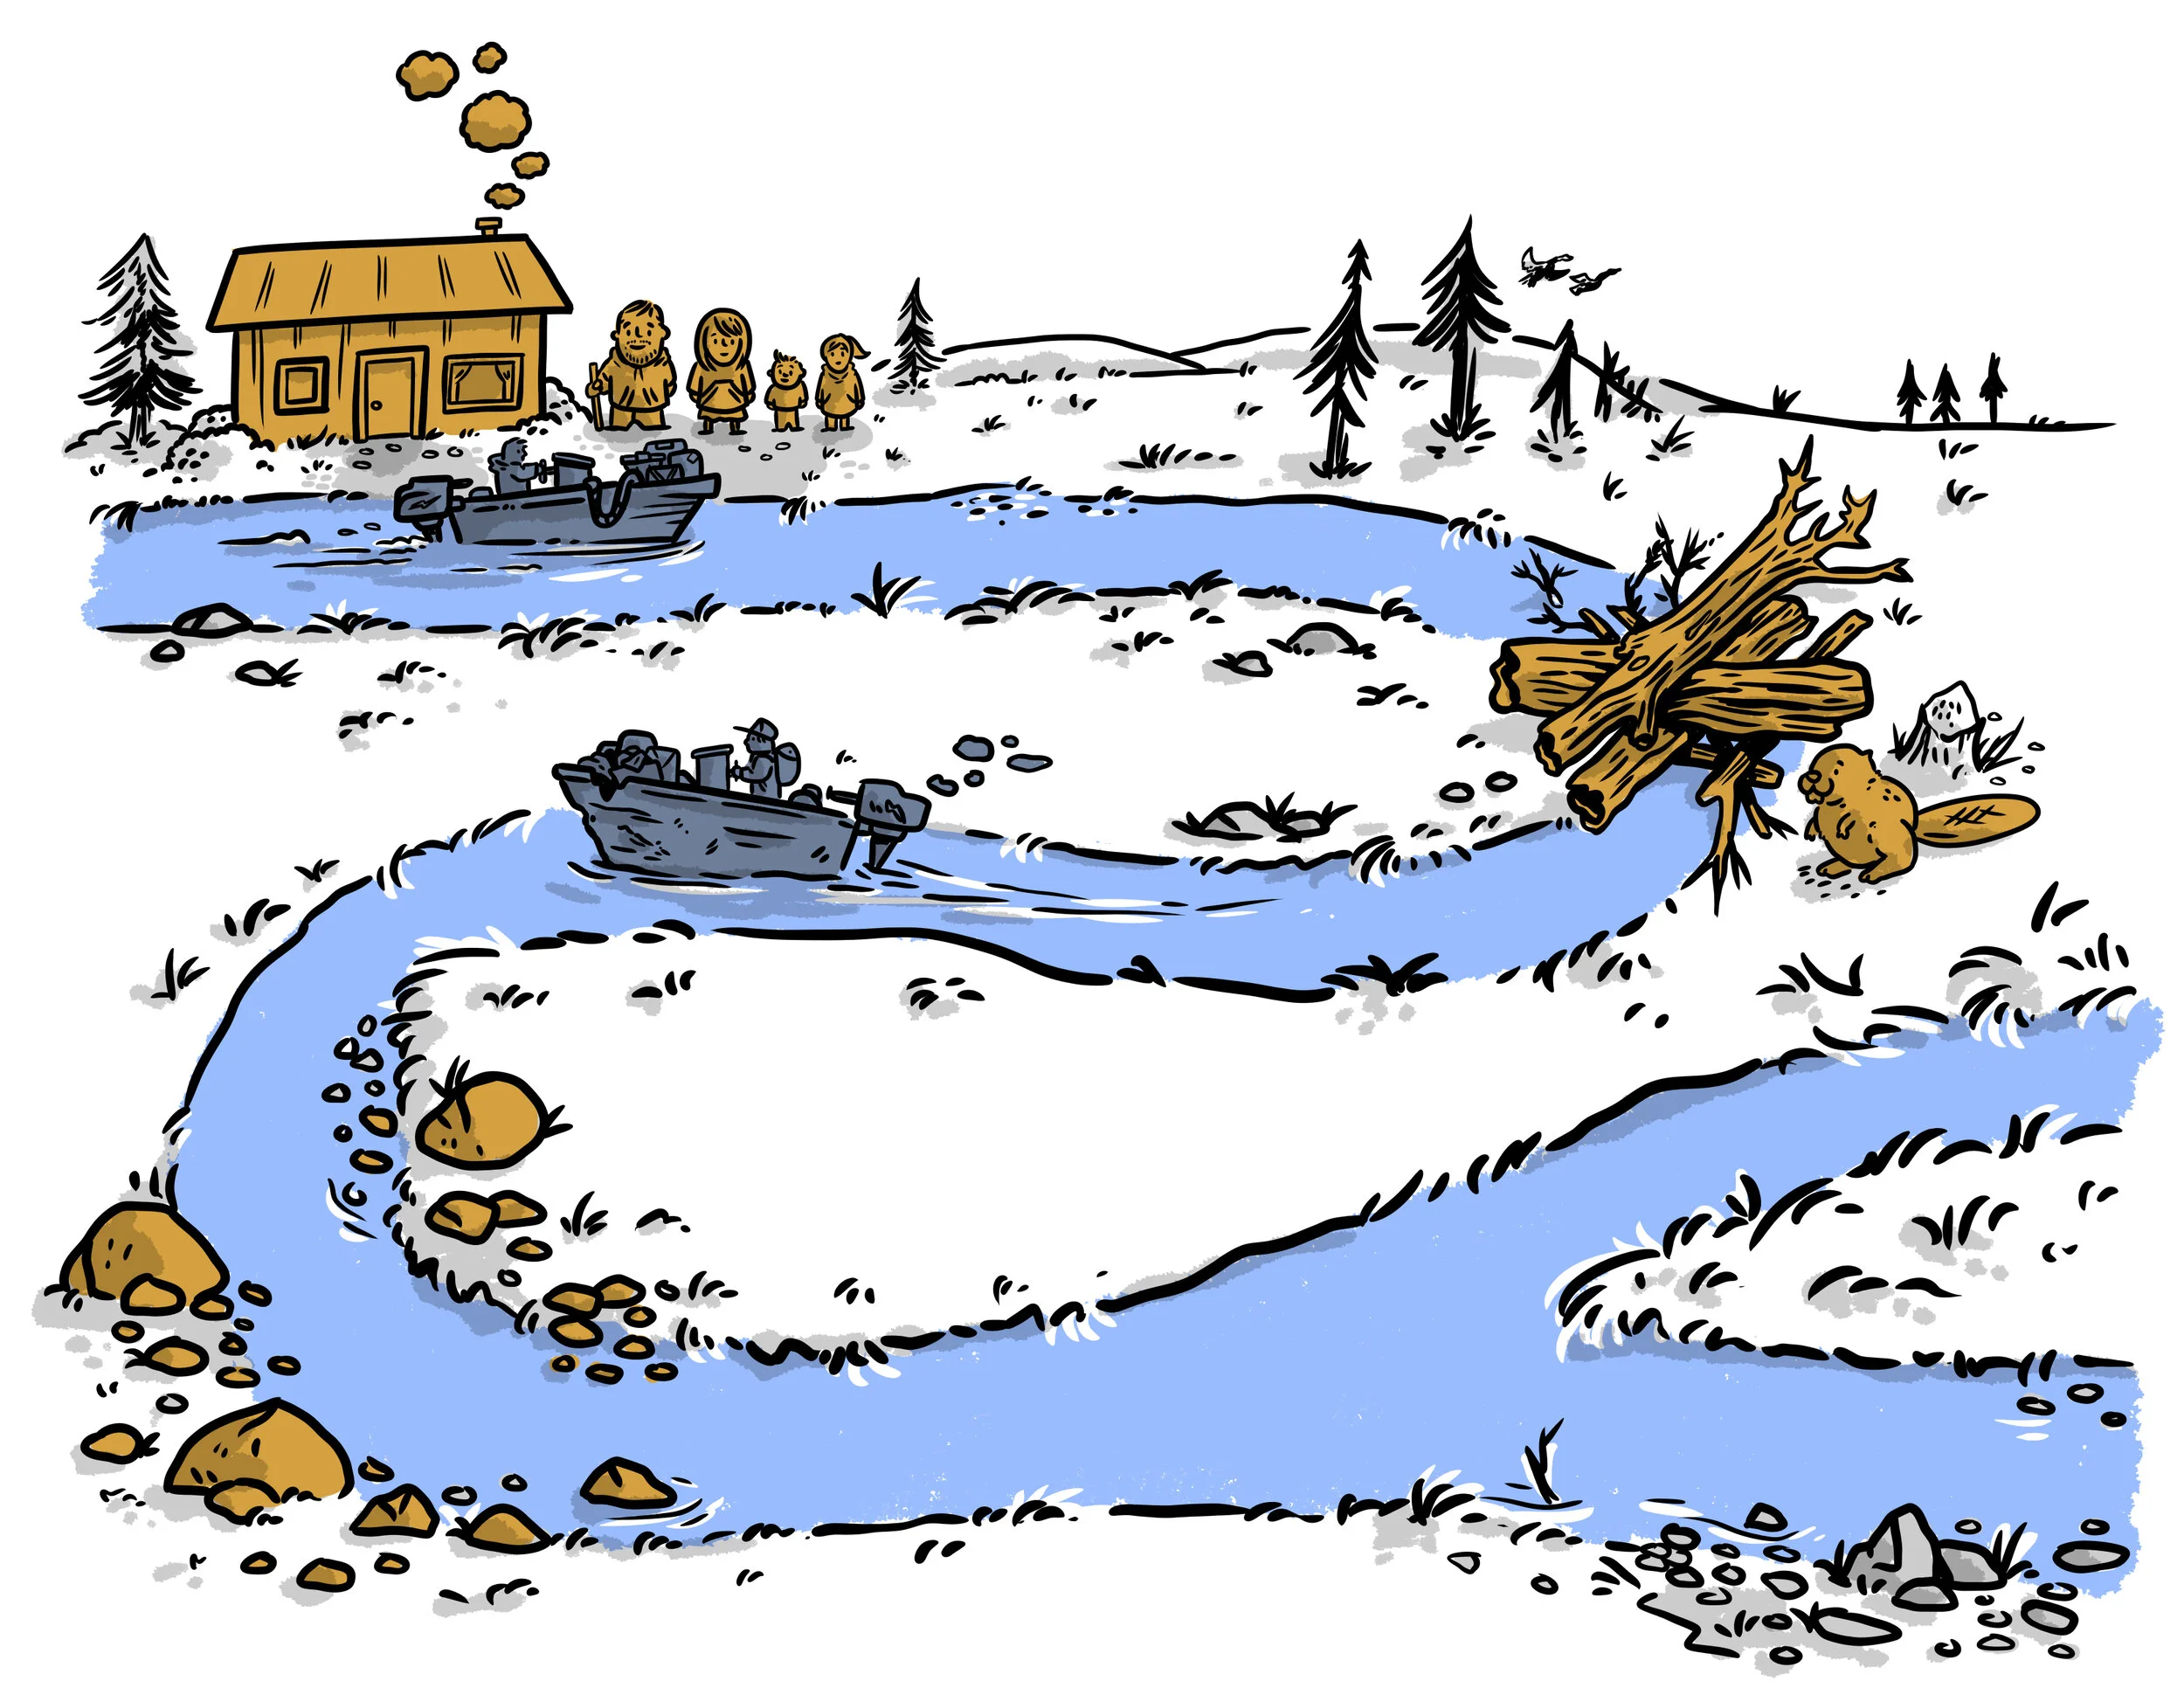
Case Study 2: Documenting a process for an Internal and External Audience
A youth serving agency contacted me to document their program recruitment and intake process for two reasons. Their first reason was staff training. They had recently hired several new staff for their community outreach team. They would use a large graphic so staff would clearly understand each step of their process to recruit youth into the program, when the youths’ parents would need be involved in the admission process, and how the various intake steps and required paperwork impacted their other team members in the organization. The second reason was to provide a quick, appealing visual flowchart that helped youth and parents understand how easy it was for a youth to become involved, as well anticipate the paperwork and interviews as part of their admission to the program.
The graphic needed to match their organization’s branding and youth focused message. It would be used as a complete image as well having each step separated into several individual images. The individual illustrations of each step in the process would be integrated into community-facing social media campaigns, signage and handouts at events, internal presentations to their managers, and to guide staff trainings. The final considerations were that the organization wanted to honor their core team by using their caricatures as the staff working with the youth and they needed the document within three weeks to make an important presentation to their leadership team.
At our first meeting, we discussed the organization’s requirements for the image and what it would need to accomplish for both their team internally and the community they would meet at school events and job fairs. We decided the size and resolution for the final graphic along with the individual steps. It was decided it would need to be shared as a printed document and as slides of a presentation, as well as used in their social media campaigns. We discussed their admission process and what parts were confusing to their staff, as well as to the youth and parents completing their path to enter the program. They also provided the written process they were currently using to train staff. This allowed us to clarify what would be included in (and what was left out of) the final graphic. The goal was easy to understand, and that acted as a checklist of everything that would be required from the program staff, youth and parents before a youth was fully enrolled. The organization also provided their logo and brand guidelines to ensure the final graphic complimented their visual identity and photos of the intake staff. Because they needed the final graphic in a short time, they assigned one point of contact for approval and review. We agreed on a plan for how I would develop the drafts and a timeframe for how they would be approved.
After the initial meeting, I provided a formal quote and we completed the contracting necessary to move forward.
During the first round of drafting, I provided a rough sketch that laid out all the steps of the graphic and how they would relate. The organization provided feedback to several steps, approved removing a step for clarity, and gave the approval to move forward.
During the second round of drafting, I provided a black and white draft of the process with draft captions. The organization provided feedback within four days and several elements were adjusted. It was understood any major changes past this point would be difficult and could impact their project deadline.
During the final round of drafting, I provided a fully colored final draft and examples how the individual steps would be shared. They approved the final draft within three days after consulting with their internal team managers.
At the final stage, I provided the organization received several versions of print quality and smaller, shareable versions of .jpeg and .pdf, as well as the final invoice.